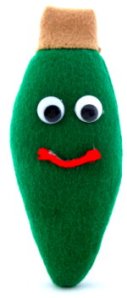
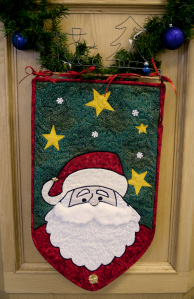
We got in a couple new patterns for you to try. Take a look below!
Fun Patterns!
October 12, 2011 — DaveytextilesDay 23: Tree Toppers
December 23, 2010 — DaveytextilesMerry Christmas every one and welcome to the last day of our advent calendar! Today’s I’m going to showcase a bunch of Christmas Tree toppers for you to try for next year. There’s great variety of toppers out there, and I’m sure you can find one for everyone. Here’s my list:
Glittered Star Tree Topper From Martha Stewart’s website. She, of course, has a bunch of gorgeous ones to try. But for now, here’s a classic design if you don’t want to get too complicated. The rest of her tree toppers can be seen at this link.
Christmas Star with Lights Unfortunately there’s no pictures, but this seems like a fairly straightforward guide to make a basic star that lights up.
Christmas Angel Here’s a guide to a basic angel tree topper if you’re not a big fan of having a star at the top. There’s a couple other tree toppers below this one on the page if you feel like looking.
Fabric Pompom For something different, try making these fabric pompoms instead of a traditional star or angel.
Ribbon Tree Topper Another different one is to top off your tree with a big bow. Here’s one tutorial to try it out with.
That brings us to the end of 2010’s Advent Calendar. There was certainly many more projects out there and feel free to look more up yourself. I hope you all enjoyed the projects. If you have any feedback, or even some pictures of the ones your tried, I would love to hear from you. Just leave me a note in the comments.
Dec 17: Felt Christmas Wreath
December 17, 2010 — Daveytextiles Here’s a nice little felt wreath ornament for you to try. I love the way they packaged it. The link for instructions and patterns is here
Items Needed:
-A selection of felts in various colours.
-Thread
-Pattern from website
-Ribbon
-Rhinestones
Dec 16: Christmas Tree Skirt
December 16, 2010 — Daveytextiles 9 Days til Christmas! Tree still naked? Here’s an easy DIY Christmas Tree Skirt for the bottom of your tree. I got this one from About.com, and it has fairly easy instructions to make it, including pictures. For the full instructions, the link is right here. Your list of materials is as follows:
Items Needed:
-4yds of fabric, preferably Holiday themed.
-Compass, circle or dinner plate.
-Lots of thread or bias tape
-Optional: Serger
P.S. Sorry about the picture, the site is missing a better shot of it. If someone makes it and gets a good shot, please let me know and I’ll feature it on here.
Dec 15: Gingerbread House
December 15, 2010 — Daveytextiles Good morning everyone! We’re on Day 15 of our Advent Calender, only ten days til Christmas! I’m certainly getting excited. For today we will be making a felt gingerbread house. Gingerbread houses are great… until it gets really stale. This is another one from the Craft Ideas website, they have a few cute ideas. The link to today’s project is here
Items Needed:
-Thick felt in medium brown and white for roof & house
-Stiff brown felt for door & windows.
-Thin felt for decorations & heart. Some pink and red for the heart, and whatever other colours you want.
-White and red embroidery floss
-Pattern from website.
Day 14: Christmas Stockings
December 14, 2010 — Daveytextiles As it’s getting closer to Christmas, today I’m spotlighting some nice simple stockings you can make. This website I got this from has a few different variations for you to try, take a look at all of them and choose which one suits you best. For instructions click here. The items needed depends on the version of the stocking you choose, so I’ll leva it up to you on what you use. Best of luck!
Dec 11: Folded Fabric Ornament
December 11, 2010 — Daveytextiles Only 14 days to Christmas! Have you finished your shopping yet? I certainly have a few things to go, but I’m ready to take on the crowds. Today’s project is a fairly simple project with results that look a lot more complicated than it is. It’s another Christmas ornament that uses folded fabric to get a lovely effect.
Items Needed:
-Styrofoam ball
-Stick pins
–Various Colourful fabrics cut into strips
–Thick Ribbon
-A Ribbon to use for a loop or an ornament hook.
How to:
1. Pin on end of the fabric and start folding the fabric into triangles on the Styrofoam ball. Secure each point with more stick pins and along the base of the triangle. Continue until ball is covered.
2. Take the wide ribbon and circle the ball to hide edges and stick bins.
3.Attach ribbon loop or ornament on top and hang on tree.
Dec 7: Christmas Light Plushie
December 7, 2010 — Daveytextiles Today’s project is one I found on Craftbits.com for a Christmas Tree plushie. I chose this one because I thought it might be a good guide of instructions to make a festive cat toy. All you would have to do is replace some of the stuffing with catnip and skip the googly eyes. It’s a good way to distract your feline friend from opening everybody’s presents early.
Items Needed:
Coloured Felt & Silver or Tan
Thread
Polyester stuffing
Catnip
Scissors
For the instructions, see the original post here


